Showing posts with label Halloween. Show all posts

Tuesday, October 20, 2015

Halloween Shadowbox by Yasmin Tölche

Hello all! It's getting closer and closer to Halloween and I've made a halloween decoration with the Marion Smith Designs "Wicked Times" Collection. I love it!


I have to say I do adore making these shadowboxes and gluing all sorts of nicknacks into them. This one was just so fun to make!


This is little shadowbox with trinkes ready to decorate my house. I've added papers for the "Wicked Times" collection to the background and glued loads of junque and gems to accent my piece. The sceleton is the coolest thing ever and are dangeling loosley in front of the box. The flowers are Marion Smith Designs and the small little brown bottle is also a junque and gems.


I can't say it enough the sceleton is just way cool. I've painted the whole box with black gesso, Then I added colorlab pigment into white gesso to make the orange and the purple paints. I covered the whole piece with crackle paint. I'm still unsure if that was the right move. What do you guys think. 

Anyways.. Hope you have a fantastic halloween celebration! Thanks for joining me here today! 

Sunday, October 18, 2015

Witch Hat by Irene Tan

Hi Marion Smith Design friends! It's Irene here and time for me to share a little spooky project. I've created a Halloween witch hat decor using Marion Smith Designs' Wicked Times collection.

Besides the fun pattern papers, I've decorated this hat with some flowers, ribbon, twine and crystals.


Supplies Used:
Haunted, Eerie, Come Hither, Raven/Wicked Times

See you all soon!
xx Irene Tan

Friday, October 31, 2014

How to make a Halloween Tag with MSD by: Aneta

Hello and happy Halloween my friends :)

Today I bring you a tag tutorial 
with Halloween as the main theme of course. 

This time the difficulty level is 2.

Here it is:


And here is a quick tutorial:

Step 1: gather your supplies.


Step 2: place your first layer of paper and a washi tape
and use some distress ink on the edges 
after gluing 


Step 3: place the second layer. 
Use Distress Tool on the edges after gluing


Step 4: continue adding layers.
Use Distress Tool on the edges.
Make a hole in the middle of your tag
for some ribbons.


Step 5: Use MSD stamps on the edges 


Step 6: ...and more stamping with MSD clear stamps.


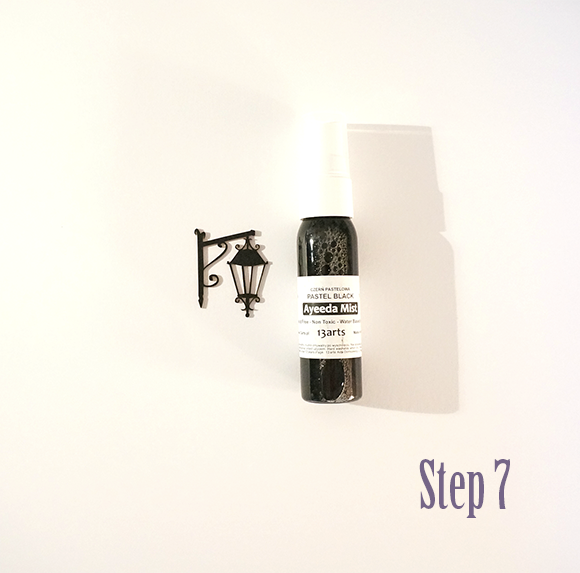
Step 7: Paint your chip board black.
I used some black mist.


Step 8: Continue adding your embellishments.
Use 3d foam for some 3d effect.


Step 9: Now I'm adding a metal flower.
Use some strong glue for this job.
Glue Dots are just perfect!


 Step 10: Last step is adding some Halloween ribbons
and flowers on top of your tag.


Supplies:

50 101008

50 101038 

50 100400

50 101058 50 101001 50 101060

And now let me announce the winner of our last challenge.
Thank you so much for playing along with me.
This was the second MSD challenge of many to come.

I hope you all had alot of fun.
Eleven amazing entries took part this time.
You can see them here
and the winner is.......


Congratulations!! Pop me an e-mail aneta@artisant.is
with all your shipping informations.


If you feel like checking out my previous tutorials

I hope you're ready to have some fun.
I've prepared the next challenge for you and I hope you'll like it.

The rules are very simple:

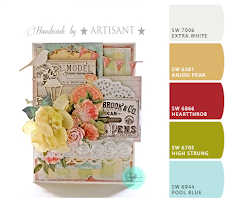
1. Use a color palette or a sketch below to start your TAG
 ( yes, we will make some tags this time :) ).
You can choose colors, sketch or both if you feel like it.


2. NO Marion Smith products required
but I would love to see some of your fantastic projects 
made with our fantastic products :)

3. When your project is ready just write a post on your blog 
and link it below. You'll find the tool in the end of this post
 (please add link directly to the post you want us to visit,
not to the entire blog)

4. This challenge is open until 26th of November.

5. Winner will be drawn out by the Random Numbers Generator
and announced 28th of November in my next: "HOW TO..." post.

And now our prize, sponsored by MSD and me:


Prize includes:
- 8 MSD tags
- 5 sheets 15x15 MSD papers
- 2 big pale yellow roses
- 6 small orange roses
- around 10 paper purple flowers
- 2 burlap mini tags 
- around 5m (together) of laces and ribbons
- 2 MSD resin roses
- 2 packages of MSD Metal Butterfies
- 1 mini glass vintage bottle 

I'll cover shipping costs of the main prize to the lucky winner :)

So, who is ready to be the lucky winner this time and have some crafty fun?

You'll find the linking on my blog :).

Thank you for visiting me and good luck everybody!
xoxo
Aneta

Friday, October 10, 2014

Spooky Halloween

Hi everybody, 

Halloween is just around the corner 
and my newest project is Halloween related....
... and of course with a hint of shabby:


I've prepared a color palette for you :


Supplies:

50 101007

50 101009


50 101038     50 101058

50 100800

and also some PTI dies and a Melissa Frances Shabby Frame.

And just a quick remind about my current challenge:

CURRENT CHALLENGE

where you can win MSD prize :)


I'd love to hear from you my friends :)
Thank you for stopping by today!
xoxo
Aneta

Tuesday, November 12, 2013

My Honey Bee Layout by Tonya Gibbs

When my sister-in-law called and asked me to take pics of this little honey bee in the pumpkin patch,  I didn't hesitate.  She was  buzzing around the pumpkins, like she was pollinating a garden. The entire time, her wings were upside down, her tongue hanging out, and buzzing noises coming from her mouth. She was so busy and absolutely ADORABLE! 


Marion's Nirvana collection was the perfect backdrop for this photos.  I used the Photo Ops for my base, because it has a nice muted turquoise color and orange damask on the b-side.  The contrast was just what I needed for my photo to take center stage.   I used smaller pieces of the Typograph paper as accents around the photo.  


For embellishments, I reached for Marion's stamps.   


The  alpha stamps were used to spell out My Honey Bee on a banner cluster at the bottom of the layout.


I used the large rose from the Curious set with some water colors in pinks and gold.  To make the flowers have a little depth I decided to mix them in with mulberry flowers, colored to match.   I also used clear gold glitter nail polish in the centers of the stamped images to give them a little texture.  


The Doilies were stamped with black ink onto a scrap of  paper from the collection, and I trimmed around them to make them look like border.  For a little added shimmer I dripped Gold Ink and the Tim Holtz bronze metallic distress paint all over the layout near the photo cluster. I love how it looks like dripping honey.  The camera really doesn't do justice to the shimmer on this layout. 


Thanks for stopping in today, please don't forget to subscribe.  If you like what you see here, please visit my blog at  for more great projects! 


Tonya Gibbs
http://www.psychomomscrapbooks.blogspot.com 

Tuesday, October 29, 2013

Halloween layout by Ana Paula Leal


Hi,everyone! 

This is Ana Paula to share a halloween layout today.
Here in Brazil we do not celebrate Halloween as it is not a tradition of our culture .
But nowadays some schools and some housing developments 
usually promote costume parties.
I took this photo of my daughter in her costume as Edward Scissorhands in a female version.
She and myself gave our best to this costume become perfect.
We watched some make up tutorials and 
she used her dramatic talent to play the character

It was very fun and I registered all with pictures
 and created this scrapbooking layout
 using papers from the Nirvana collection with a dark look ,
 gray shades ,
 black paint and colors that remind me 
Halloween.