Showing posts with label Marion Smith. Show all posts

Monday, August 17, 2015

Annie from Planner Creative Team

Hi love bugs!

It's Annie again and I'd like to share my weekly layout spread with you all. I hope you'll all enjoy how my week turned out in my Heart of Gold planner (:

Here are my photos:


This is the entire weekly spread, as you can see I used cute stamps to date my inserts and stickers to add embellishment to my planning:


 This is a close-up of the first half of the spread. I used some alpha stickers for the name of the month. I also used some die cuts for a cute flair.


 This is a close-up of the second half of the spread. I use the tracker for water, medicine, and vitamins. I'm thinking about adding daily work outs to this area as well. I'm hoping it'll motivate me to keep up with the work outs cause I neeeeeed it!

And that's everything! Thank you for stopping by and feel free to leave comments on this post so I can respond to you <3

Thursday, June 5, 2014

Layout | Family Matters by Angela Carter

This layout came together after I found a great pictures of my niece and nephew. They are two of the cutest kids I've ever seen and I just love them to pieces.


I started with the background papers. I just had this idea of tilting a large piece of patterned paper so I tried it. Hey, what can it hurt right. I love how it instantly adds movement to the layout. All the other papers are scraps that I've been hoarding storing in my stash. 


After I came up with the title the rest of the layout really came together. I often struggle with titles on my layouts and where to put them. I pulled these rather large thickets from my stash and willed myself to use them on this layout. I think it worked out well. 


The Junque and Gems added the right bit of detail to balance out the rather large thickets. I love when things happen to work out like that. I also pulled some of Marion's washi tape from her Romance Novel collection. The black and white fabric frame draws the eye to the photo and the black and white swirl paper brings breaks up all the lines from the rectangle layers. A tag tells the story. 


Thanks for stoppithat you have in your stash that you haven't figured out how to use? 


Thanks for stopping by.

Angela


Supplies: 


Sunday, January 12, 2014

Signature Album by Ana Paula - part 1

Hi, everyone!
 Ana Paula here and today is my turn to share a project with you.
I want to show you the fisrt part of a very special project for my family.
This signature album will be used to celebrate the golden wedding of my parents-in-law.
My mother-in-law asked for the guests a donation for a Female Network against Cancer in her city.
A noble gesture of her. 
 She also  wanted people left some messages, 
some kind and friendly words that she wants to keep forever
 to remember  this special occasion.
Said that, 
 I had to create  an album  to be on a par with this  
wonderful party in golden hues. 

I used some papers from the Nirvana line  
and mixed with some  papers from the Mad Tea party line 
to give a retro look to the entire project.
Here is the cover of the album:


I purchased the album and customized it using papers and embellishments.
I covered some chipboards and used  foam tape to layer them symmetrically.
I also used metallic flowers, sparkles in arabesques, 
resin frames with patina technique and
 some MDF charms complete this cover 
with hues of golden as the main inspiration.

Monday, January 6, 2014

Grunge Glamour

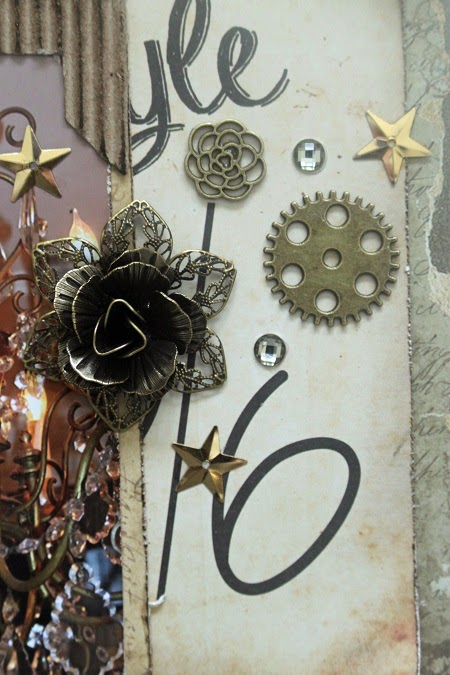
Hello there! Sarah here and I would like to share a layout with you today, using the new Garment District line along with some Junque & Gems! I totally went out of my comfort zone on this one, I wanted a grungy glamorous type of look, and it felt really good! I am absolutely a chandelier junky, so when I saw this one I had to steal a pic ;)

 
I strung some real vintage chandelier pieces along the bottom of the page, and also added some bits and pieces from my stash.
 
I cut apart one of the collage papers in the Garment District line, distressed the edges, and scattered them to make a "bed" for the picture.
 
 
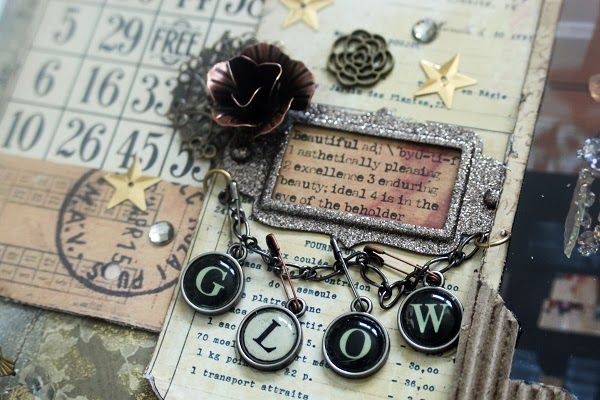
Then just sprinkle some doo dads across that area, many from the Junque & Gems line. They are so fabulous! Lots of goodies to pic from!


More bits n pieces ;)


If you take a chandelier drop, add some glossy accents to the back of it and press down on a piece of patterned paper, it looks really cool!

 
I thought the light bulb from the Junque & Gems line really fit good lol!

 
It was a lot of fun, getting out of my comfort zone! You should try it, it really pushes your creativity!
 
Have a wonderful day!
 
Love, Sarah
 
P.S. Here are the items I used;
 
 
(And the "in this style collage cut is from the Mad Tea Party 6x6 Paper Pad!)


Friday, October 25, 2013

Halloween Home Decor by Tonya Gibbs

Marion issued us a challenge this month to create a Halloween home décor item using paper from her collections. 
 
I decided to use her Mad Tea Party Line for my project, and a cut file from the Silhouette Store.  The original cut file was designed for a candy/treat container.   I added a battery operated tea light inside the hat to make it a luminary. 

Halloween Altered Spool Home Decor  by Tonya A. Gibbs for Marion Smith Designs.  #MarionSmithDesigns #MadTeaParty #TimHoltz #AlteredArt #Halloween #HomeDecor #TonyaGibbs #Psychomomscrapbooks
 
I recycled a plastic lace spool for the stand, and covered it with black lace.  Scraps of paper from Marion's other papers were used to make rolled roses. I sprayed them with Perfect Peach and Pink Taffy Glimmer Mists. Once they were dry, I added glitter nail polish to make them sparkle.   Since the clock in the patterned paper was set to almost midnight,  I decided to make a banner and title it "The Witching Hour". The font used on the banner was Dilana Experiment.  Clear glitter nail polish offered an iridescent effect to the little black crows.


The grass is actually white yarn that I stained with Forest Moss Distress Stains, then I added the clear glitter nail polish in small areas for added texture and shine.   I poured clear and pink glitter nail polish inside a small bottle  to create a sparkly potion.  I love that the nail polish didn't mix. 
 
It was fun creating this luminary, and thought it would be great to fill up a small shelf.
 
Thanks for stopping in today, if you haven't already subbed - please do so!
 
Tonya Gibbs