Showing posts with label mini albums. Show all posts

Monday, June 30, 2014

Mini Albums | Marion Smith Design Team Farewell

It's been a wonderful year with the very 1st Marion Smith Design Team.

We have formed a sisterhood like no other. These ladies have demonstrated their exceptional talents for an entire year and we are so proud and honored to have these ladies showcase the Marion Smith Brand! They have left big shoes to fill for the incoming group of designers. They will always be remembered as the first. 

Today we are sharing one of Marion Favorite projects: Mini-Albums! 

Click on the DT Members names to view details of the projects. 


Peggy Baker


Colette Nederhoff


Aneta Matuszewska


Thank you for stopping by. We will be back tomorrow with more.
Also our new design team will be announced this week. 


Angee Carter


Thursday, January 23, 2014

Signature album by Ana Paula- part 2

Box and Openning pages 

Hi, everyone. Ana Paula here to show the second part of the album I created for the Golden wedding of my parents- in-law.

This is the lid of the box that will keep the Signature Album .
 I choose the same hues of Golden and light green.


One picture of the couple is highlighted for a resin frame 
using gilding techniques over the papers by Nirvana Collection by Marion Designs
 and their initial monograms.
Some metallic embellishments and one in special:
 a lock and a key meaning a treasure that will be kept in their hearts.

Everything over the beautiful Marion Smith Designs papers  that makes the composition of this layout full of meanings and memories and I am sure will be kept with love for that couple.
On the firsts pages of the album I adhered a copy of their first wedding invitation in 1964 and one copy of the Golden Invitation too.


Old  and current pictures  are highlighted by the beautiful papers from Marion Smith Designs.
I do hope they like it.
 It was a blast thinking in every detail of this gift
 that I will give to them with all of my heart.

Sunday, January 12, 2014

Signature Album by Ana Paula - part 1

Hi, everyone!
 Ana Paula here and today is my turn to share a project with you.
I want to show you the fisrt part of a very special project for my family.
This signature album will be used to celebrate the golden wedding of my parents-in-law.
My mother-in-law asked for the guests a donation for a Female Network against Cancer in her city.
A noble gesture of her. 
 She also  wanted people left some messages, 
some kind and friendly words that she wants to keep forever
 to remember  this special occasion.
Said that, 
 I had to create  an album  to be on a par with this  
wonderful party in golden hues. 

I used some papers from the Nirvana line  
and mixed with some  papers from the Mad Tea party line 
to give a retro look to the entire project.
Here is the cover of the album:


I purchased the album and customized it using papers and embellishments.
I covered some chipboards and used  foam tape to layer them symmetrically.
I also used metallic flowers, sparkles in arabesques, 
resin frames with patina technique and
 some MDF charms complete this cover 
with hues of golden as the main inspiration.

Thursday, November 14, 2013

Shabby Notebook

Hi my blog friends, 

Aneta here:)

My newest project for Marion Smith Design is a cute little shabby notebook.
I like to do this the old fashioned way, so I sometimes write down my friends addresses.

When I received the MAD TEA PARTY Collection 
I knew right away that this collection was just made 
for shabby projects.


I made a small pocket on the inside for some secret notes:


and also in the back:


I put two extra sheets in the middle for a shabbier effect:


For this project I used :


How do you keep your precious addresses?

Remember to visit again for more daily inspirations !

Thank you for stopping by and all the sweet comments :)
xoxo
Aneta

Sunday, September 15, 2013

Fake Carved title tutorial by Ana Paula Leal

This is an easy and versatile technique.
You can apply it in your scrapbooking layouts with a thicker base as chipboard
 or in a cover of a mini album like I did. 
 You can find it easily in your Local Scrapbooking store to customize-it. 
The title can be a wordlet and must be in wood, MDF or a thicker chipboard.


Using a great adhesive power glue, apply the title in the desired surface.


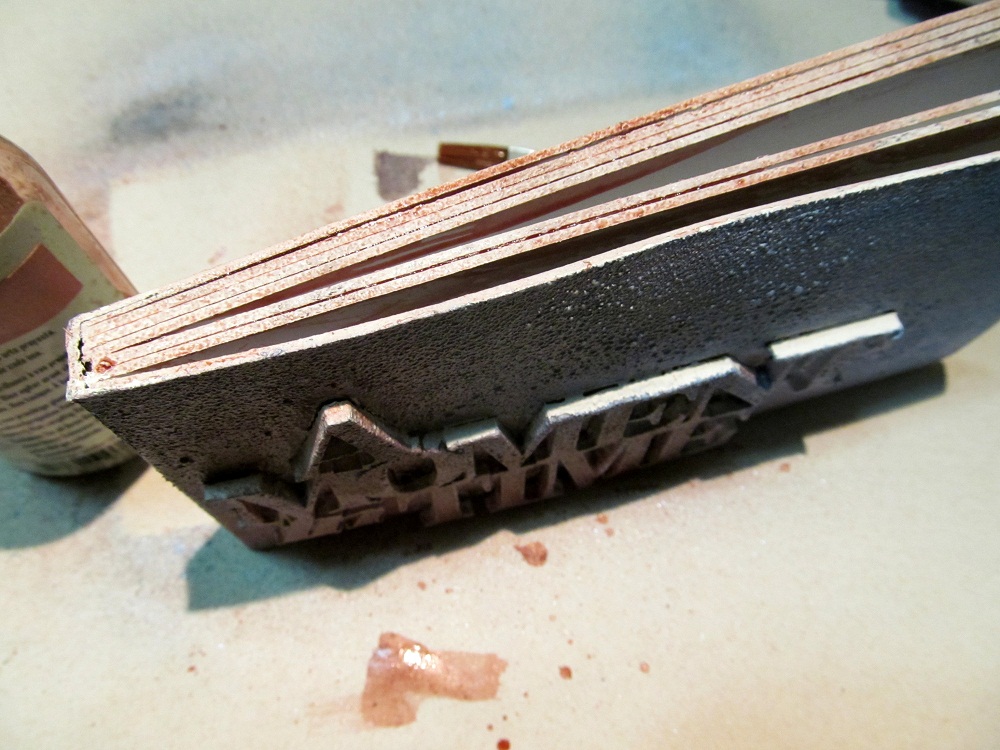
Cover with gesso all the surface.
 You can use a paint brush to paint the corners and the inner of the letters.
Use a great amount of gesso to assure the piece will be completely covered.


Choose 2 contrasting colors of Glimmer mist or any spray paint
 and apply for all the surface 
Wait until the paints  dry.
 ( I used the colors Denim blue and Rose tea from Glimmer mist.) 


Repeat the process in the back of the mini album.
 Look how cool this effect is! It looks like marble.


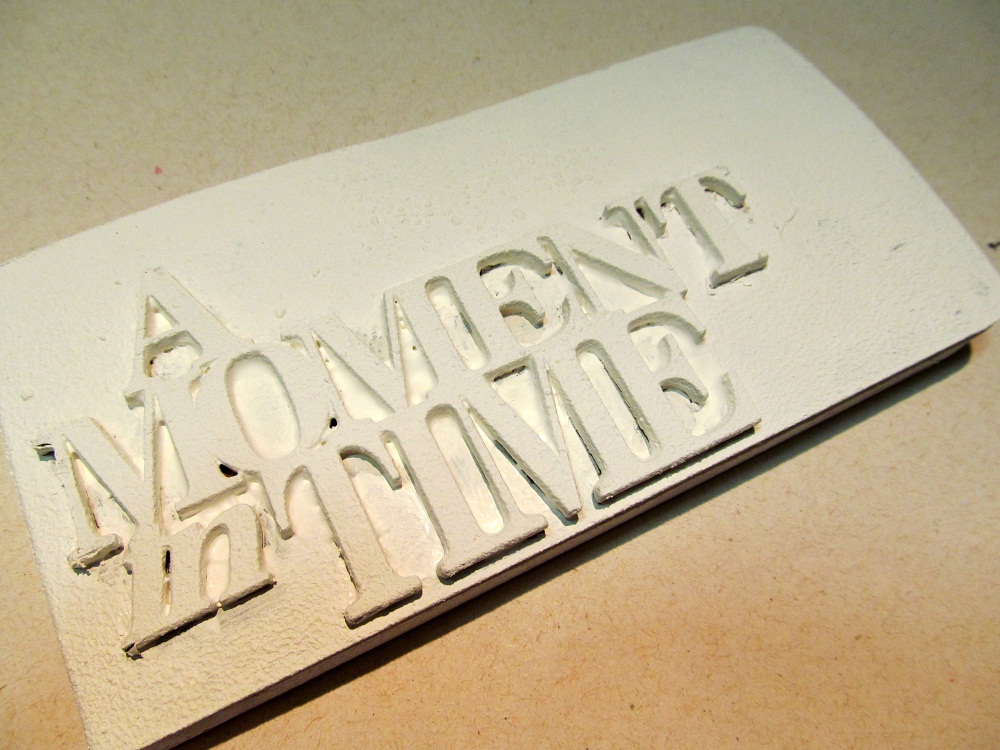
With a paint roller and  little bit of white paint,
 you can paint the title .
This way you will get a light effect.
 Do it on the corners of a mini album or
 in the background of a scrapboking layout.


Stamp all the cover using stamps of backgrounds or small motifs.
 Layer the motifs creating new patterns all over the surface.

The desired effect here is a fake sculpture.
It seems that the title was carved on the paper.
You can use swirls and any piece in chipboard
 to create different effects and results.

For the inner pages I used the beautiful papers from the Nirvana collection. 
This mini album  is a gift  for a friend of mine
 to register a trip with small pictures and some notes.


Sunday, September 1, 2013

Creating A Faux Antique Wallpaper Cover On A Mini Album by Kim Price


Hi guys. Today I wanted to call in and share with you a few tips on how to recreate a cool antique wallpaper texture for a mini book or album cover on your own project.
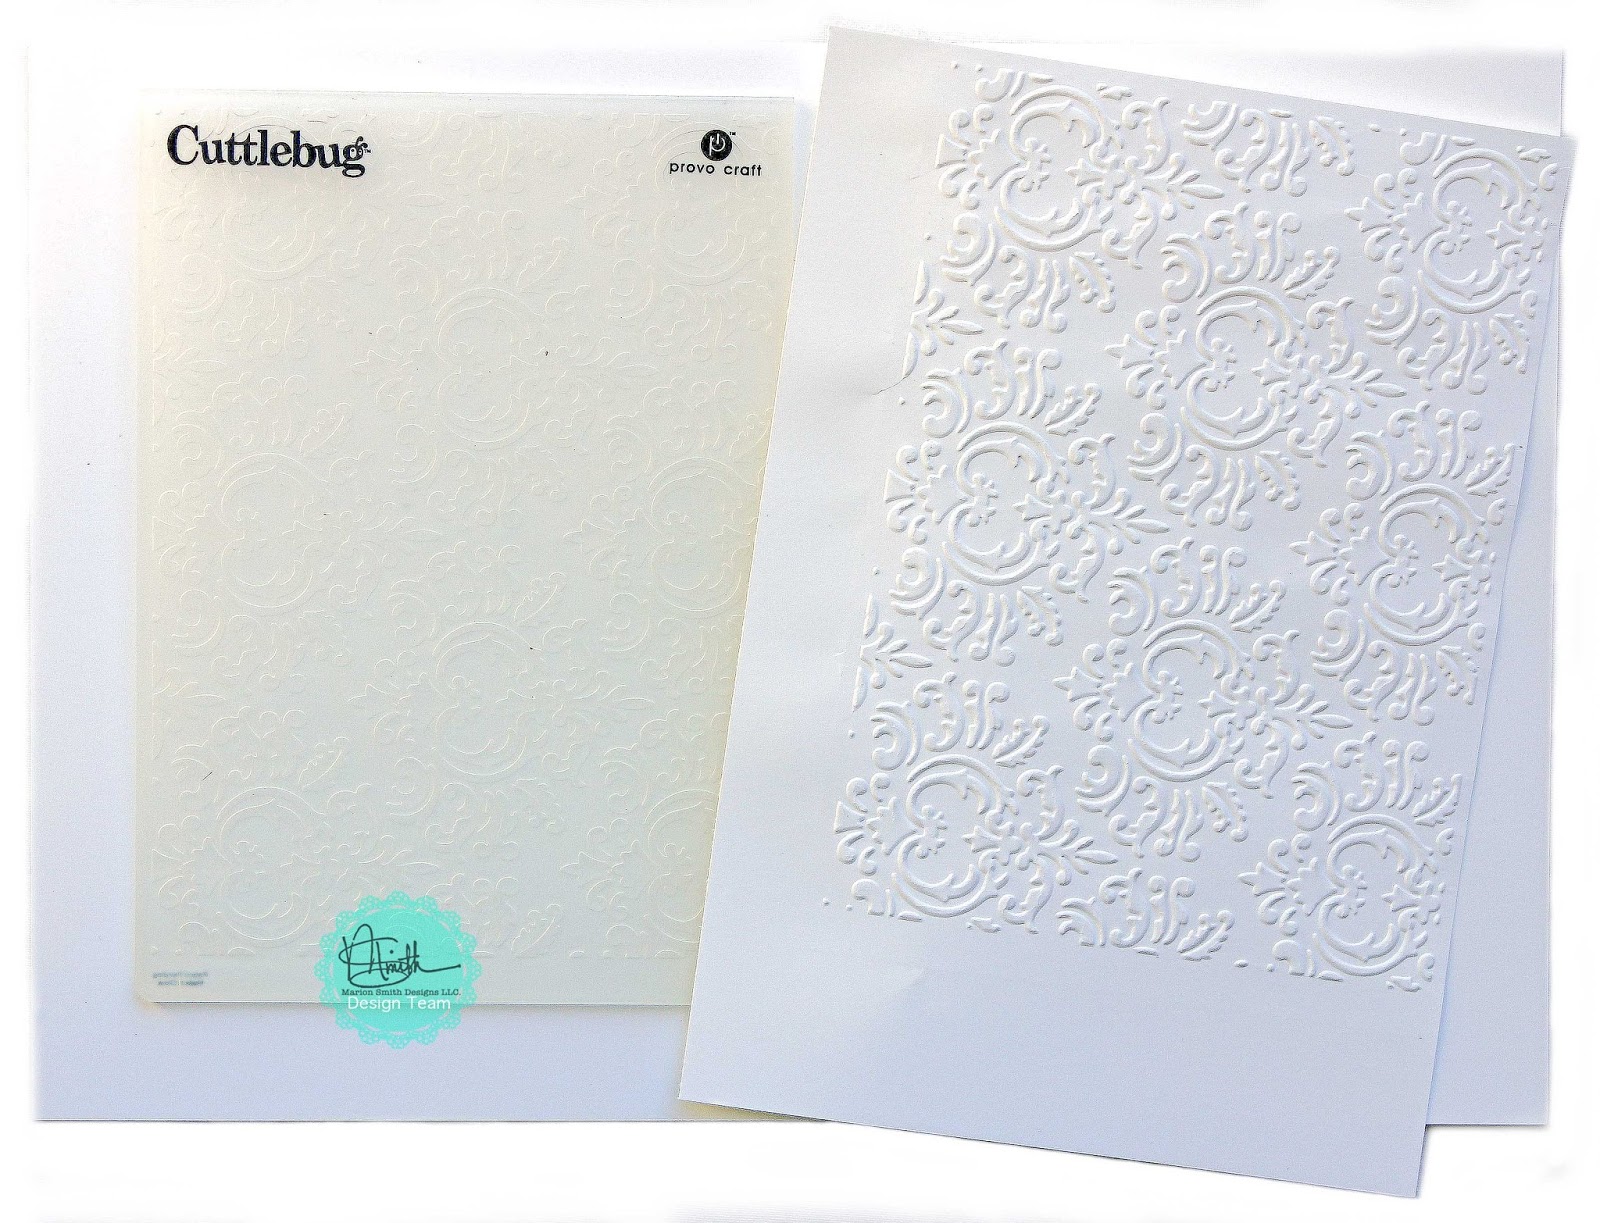
Firstly you will want to gather some supplies together which I have pictured and listed below. Please remember that you can improvise with the things you already have at home if you do not have the exact same product I am using and I will make a few suggestions so you get the idea.


Supplies:

- smooth white cardstock
- a Cuttlebug Jamara embossing folder or similar product such as Sizzix Texture Fades in a design of your choice
- a Cuttlebug or similar machine capable of embossing ie. Big Shot
- Impasto Medium or texture paste, any brand is fine
- palette knife or plastic knife
- Prima Distress Tool or nail file, emery board, sandpaper
- old paintbrush - I like to use a flat strong bristled brush for this kind of thing, the older the better
- clear gel adhesive or similar ie. Helmar 450 is perfectly fine
- matte acrylic paint in your choice of color plus an antique brown shade
- heavy chipboard book covers either pre-purchased or cut your own from larger chipboard sheets. Mine measure approximately 6x6 inches


Run your white cardstock through your embossing machine using a pattern of your choice making sure one of the edges of the cardstock lines up with one of the edges of your folder as shown.


Flip the embossed cardstock to the reverse side and using your palette knife, gently scrape an even amount of impasto into the recesses of the design. This will help the embossed texture to keep its shape over time and not flatten out with wear and tear. Allow to dry thoroughly.


Apply an even coat of liquid adhesive to your chipboard base - you don't need loads of adhesive, just enough to ensure a good bond , then carefully adhere your embossed cardstock to the chipboard ensuring the edges line up. Smooth the surface gently with your fingers to remove any trapped air.


Trim any excess cardstock from around the edges of your chipboard base, then gently distress the edges with your distress tool. 

You can now paint a coat of your favourite color matte paint over the cardstock, allow this to dry and then roughly brush the edges of your book cover with beige colored paint for an instant antique look.

I have used Adirondack Acrylic Paint Dabber in Pool to color my album, but this would look equally as  beautiful done in a nice shade of pink or peach, sage green, lemon, antique white. Even black would look amazing!


Thank you for calling in today, I hope you find some inspiration and create your own book covers using this embossing technique.